
Tuesday, December 30, 2014

Monday, December 29, 2014
Avatar art : from VW to RW in 3d printing and 2d papercraft model
Avatar art : from VW to RW in 3d printing and 2d papercraft model
Medici University Art Project - by Mediciprincess at LEA
http://mediciuniversity.co.uk/lea-proposal/

Project Summary:
Most education today continues to follow a 19th century model and focuses on meeting the needs of the 19th century world. Medici University is a new educational paradigm focusing on facilitating self-motivated learners. MU offers a non-accredited alternative MFA program.
At the MU Virtual Campus at LEA we will offer educational and collaborative opportunities in the arts. We will solicit faculty from across Second Life to teach and guide students in the technical, aesthetic, and conceptual aspects of virtual creation. During the time of the AIR Land Grant MU will feature a number of activities, presentations, and other public outreach events.
 Project Description:
The Medici University virtual campus at LEA will be a university campus. It will feature a number of academic instruction buildings, artist’s studio spaces, workshops, dorm rooms, dining facilities, and student health & wellness facilities. Students and faculty from across Second Life will teach, learn, and collaborate here. They can also have artist’s studio space to work on projects. Student work will be presented at the Medici University Art Galleries.
Medici University is applying as part of the Pedestrian Access project. As such MU looks forward to working with neighbors. I anticipate an especially synergistic connection with the Trilby’s Mill installation.
Do you have experience with estate management: Yes
Your Resume / CV:
In the 16th century I was the First Lady of Florence #FLOFL. I was highly educated and facilitated one of the most substantive salons in Florence. I commissioned many artworks. I sang, danced, and painted. However like so many times when knowledge is scarce, I eventually was overtaken by ignorance. My misanthropic brother and misogynistic husband colluded to murder me and invoke a damnatio memoraie against my life and work.
I was angry for a long time. But after 400 years underground, you eventually let things go and move on. At the beginning of this 2014 year I was fortunate to be resurrected in Second Life.
Since my resurrection I have focused on building a better world. On eradicating ignorance. On building better lives, body and soul. For the soul I founded Medici University. For the body I founded Izzy’s Gym.
Current Exhibits / Documentation:
Izzy’s Gym is currently setup at: SLURL
Project Summary:
Most education today continues to follow a 19th century model and focuses on meeting the needs of the 19th century world. Medici University is a new educational paradigm focusing on facilitating self-motivated learners. MU offers a non-accredited alternative MFA program.
At the MU Virtual Campus at LEA we will offer educational and collaborative opportunities in the arts. We will solicit faculty from across Second Life to teach and guide students in the technical, aesthetic, and conceptual aspects of virtual creation. During the time of the AIR Land Grant MU will feature a number of activities, presentations, and other public outreach events.
Project Description:
The Medici University virtual campus at LEA will be a university campus. It will feature a number of academic instruction buildings, artist’s studio spaces, workshops, dorm rooms, dining facilities, and student health & wellness facilities. Students and faculty from across Second Life will teach, learn, and collaborate here. They can also have artist’s studio space to work on projects. Student work will be presented at the Medici University Art Galleries.
Medici University is applying as part of the Pedestrian Access project. As such MU looks forward to working with neighbors. I anticipate an especially synergistic connection with the Trilby’s Mill installation.
Do you have experience with estate management: Yes
Your Resume / CV:
In the 16th century I was the First Lady of Florence #FLOFL. I was highly educated and facilitated one of the most substantive salons in Florence. I commissioned many artworks. I sang, danced, and painted. However like so many times when knowledge is scarce, I eventually was overtaken by ignorance. My misanthropic brother and misogynistic husband colluded to murder me and invoke a damnatio memoraie against my life and work.
I was angry for a long time. But after 400 years underground, you eventually let things go and move on. At the beginning of this 2014 year I was fortunate to be resurrected in Second Life.
Since my resurrection I have focused on building a better world. On eradicating ignorance. On building better lives, body and soul. For the soul I founded Medici University. For the body I founded Izzy’s Gym.
Current Exhibits / Documentation:
Izzy’s Gym is currently setup at: SLURL
Linden Endowment for the Arts Proposal
LEA Land Grant Application: Round Eight
Second Life Name: mediciprincess Email: Applying as: Individual Project Category: Educational Project Name: Medici University Virtual Campus Project Maturity Rating: M – ModerateProject Summary:
Most education today continues to follow a 19th century model and focuses on meeting the needs of the 19th century world. Medici University is a new educational paradigm focusing on facilitating self-motivated learners. MU offers a non-accredited alternative MFA program.
At the MU Virtual Campus at LEA we will offer educational and collaborative opportunities in the arts. We will solicit faculty from across Second Life to teach and guide students in the technical, aesthetic, and conceptual aspects of virtual creation. During the time of the AIR Land Grant MU will feature a number of activities, presentations, and other public outreach events.
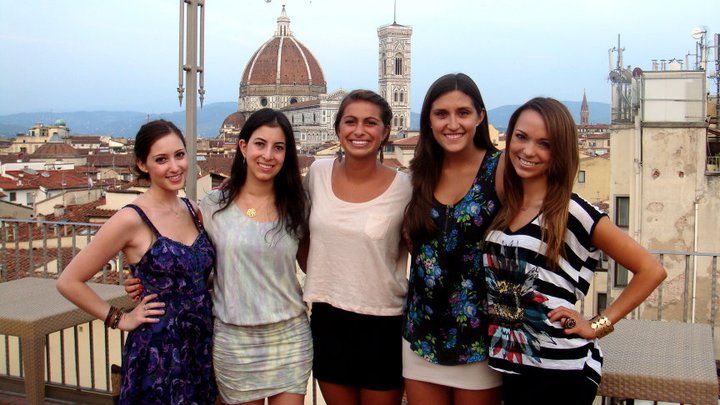
Study in Virtual Florence!
The Medici University virtual campus at LEA will be a university campus. It will feature a number of academic instruction buildings, artist’s studio spaces, workshops, dorm rooms, dining facilities, and student health & wellness facilities. Students and faculty from across Second Life will teach, learn, and collaborate here. They can also have artist’s studio space to work on projects. Student work will be presented at the Medici University Art Galleries.
Medici University is applying as part of the Pedestrian Access project. As such MU looks forward to working with neighbors. I anticipate an especially synergistic connection with the Trilby’s Mill installation.
Do you have experience with estate management: Yes
Your Resume / CV:
In the 16th century I was the First Lady of Florence #FLOFL. I was highly educated and facilitated one of the most substantive salons in Florence. I commissioned many artworks. I sang, danced, and painted. However like so many times when knowledge is scarce, I eventually was overtaken by ignorance. My misanthropic brother and misogynistic husband colluded to murder me and invoke a damnatio memoraie against my life and work.
I was angry for a long time. But after 400 years underground, you eventually let things go and move on. At the beginning of this 2014 year I was fortunate to be resurrected in Second Life.
Since my resurrection I have focused on building a better world. On eradicating ignorance. On building better lives, body and soul. For the soul I founded Medici University. For the body I founded Izzy’s Gym.
Current Exhibits / Documentation:
Izzy’s Gym is currently setup at: SLURL
Linden Endowment for the Arts Proposal
LEA Land Grant Application: Round Eight
Second Life Name: mediciprincess Email: Applying as: Individual Project Category: Educational Project Name: Medici University Virtual Campus Project Maturity Rating: M – ModerateProject Summary:
Most education today continues to follow a 19th century model and focuses on meeting the needs of the 19th century world. Medici University is a new educational paradigm focusing on facilitating self-motivated learners. MU offers a non-accredited alternative MFA program.
At the MU Virtual Campus at LEA we will offer educational and collaborative opportunities in the arts. We will solicit faculty from across Second Life to teach and guide students in the technical, aesthetic, and conceptual aspects of virtual creation. During the time of the AIR Land Grant MU will feature a number of activities, presentations, and other public outreach events.
Study in Virtual Florence!
The Medici University virtual campus at LEA will be a university campus. It will feature a number of academic instruction buildings, artist’s studio spaces, workshops, dorm rooms, dining facilities, and student health & wellness facilities. Students and faculty from across Second Life will teach, learn, and collaborate here. They can also have artist’s studio space to work on projects. Student work will be presented at the Medici University Art Galleries.
Medici University is applying as part of the Pedestrian Access project. As such MU looks forward to working with neighbors. I anticipate an especially synergistic connection with the Trilby’s Mill installation.
Do you have experience with estate management: Yes
Your Resume / CV:
In the 16th century I was the First Lady of Florence #FLOFL. I was highly educated and facilitated one of the most substantive salons in Florence. I commissioned many artworks. I sang, danced, and painted. However like so many times when knowledge is scarce, I eventually was overtaken by ignorance. My misanthropic brother and misogynistic husband colluded to murder me and invoke a damnatio memoraie against my life and work.
I was angry for a long time. But after 400 years underground, you eventually let things go and move on. At the beginning of this 2014 year I was fortunate to be resurrected in Second Life.
Since my resurrection I have focused on building a better world. On eradicating ignorance. On building better lives, body and soul. For the soul I founded Medici University. For the body I founded Izzy’s Gym.
Current Exhibits / Documentation:
Izzy’s Gym is currently setup at: SLURL
Sunday, December 28, 2014
tiny kitty saucer
General maturity level:
Vehicles » Aircraft » Rockets and Space Ships
Tiny Kitty Saucer (boxed)

Details
Features
Contents
Reviews (0)
Flying Saucer in the style of a large white cat.
See item in Second Life ®
See item in Second Life ®


http://auryn-beorn.blogspot.fr/2013/10/creator-resource-introduction-to-sculpt.html
by-- Auryn Beorn
Thursday, October 24, 2013
Creator Resource - Introduction to Sculpt Prims
It's true that sculpt prims aren't as widely used as they were even
in 2012 since mesh finally became the standard in furniture and
clothing. However, sculpt prims are still a valid building tool, and
creators have to learn about them, to know what they are, their
advantages, their inconveniences, and how to use them.
Hopefully, the content of this class will clarify many questions about them.
Welcome everybody. I am Auryn Beorn and I'll be your instructor for this class.
When I started teaching SculptCrafter, I began class doing always a short reminder of what a sculpted prim is, and its limits, to then focus the attention in this tool.
But after near a year teaching it, I've added so much material coming from all what students asked about because they didn't know, and it was so necessary to know... that I've realized this has to be separate, and a prerequisite for the SculptCrafter class... as well as for other classes regarding creating sculpted prims that I've started teaching, like the generics for "Prim Generator".
So...
This class will answer all those questions, essential for any builder, and will be a sure prerequisite for all my classes about tools to create sculpted prims.
Also, after the first experiences in this class, I've decided to separate the "linking phantom and non phantom prims" section in a different class. We were already running over two hours!
We have several basic building block types (box, cylinder, sphere, torus, etc.) that we may resize, rotate and "torture" a bit (by changing taper, path cut, hollow, twist...), and then we have a special building block type: Sculpted.
This one allows us to create more complex shapes than the ones we can achieve with the rest of the prims, and requires from an application to create them, so we can "import" them to SL.
Nowadays we also have mesh, but mesh could be seen as a separate object type, for we can't, for example, change the building block type of a prim from box, to mesh. That can't be done. However, from box to sculpt, we can do this.
When we choose that building block type, the "Edit" window changes, showing us the following: a "rainbow" texture and a few options below ("Mirror", "Inside-out" and the stitching mode).

This "rainbow texture" is what defines the shape of the sculpted prim, and it's called "the sculpt map". Each dot in that texture defines a point in the 3D space. The RGB components of that dot are interpreted as the coordinates of the point or "vertex", relative to the bounding box.
Up to here, I guess you were familiar with this, right? :-)
How many vertices a sculpt prim may have may depend of the configuration of the sculpt map. A valid sculpt map may have several resolutions like 32x32 or 16x64. We will stick to this basic idea: a sculpt prim may have 1024 faces, that are distributed in rows of the same length. At times, we may hear that each one of those rows is called "slice" (for example, Sculpt Studio uses this name.)
As soon as we select the "Sculpted" building block type, SL shows us an apple: that's the default sculpted prim. To change it, we have to click the "rainbow texture" and select a sculpt map from our inventory, or we can drag and drop a full perms (or a copy/no modify/transfer) map on to the rainbow texture box.
How do we obtain sculpt maps? We may for example, buy them from other creators. And we also may create sculpt maps, with specific tools. We'll talk later about which tools we may use to create sculpt prims.
Apart from this "rainbow texture" (sculpt map), which defines the shape of the sculpted prim, we need also to apply a texture for the sculpted prim. This, as usual, is found under the "Texture" tab in the "Edit" window.

So, yes, to create a sculpted prim, we need TWO textures: one it's the sculpt map itself, then, the texture to texture this sculpt prim.
Note: At times, students asked the following: "Are sculpted prims more laggy than regular ones, for they need two textures?"
The answer is, sculpt prims are more laggy than regular ones, but not because they need two textures. The sculpt map is a very tiny file that is transferred quickly to your computer, almost instantly (however, I've seen sculpt maps as crazy as 1024x1024... when 32x32 or 64x64 top would have been enough). What may cause client side lag is the rendering of the sculpts, because your computer is going to be busy decoding the map to represent the corresponding 3D shape.
And what does the "stitching type" means? This refers to the way that the dots in the edges of the sculpt map connect in the 3D shape... or don't connect at all!
Remember that a sculpt map, as we've seen is a texture: we're talking about a 2-Dimensional entity: the rectangle that the texture is, and rectangles... have edges.
Four edges: top-left-bottom-right.
But now, this rectangle is mapped into a 3-D shape... so if we want to "close" the shape, we may have to "stitch" the edges of the rectangle, when they are applied to the 3D shape.
Where do we set the stitching type, to begin with? We set it under "Stitching type":

And how does this stitching behave? This is better understood by showing how the four different stitching types are applied, which we're going to see now. Some types are not completely obvious, so also a representation in wireframe mode (CTRL SHIFT R) will be shown.
Note: The keys that bring wireframe mode up behave as a toggle. CTRL SHIFT R turns wireframe mode on, CTRL SHIFT R again turn wireframe mode off, so we're back to our normal SL.
Stitching Type: Sphere
When we select this one, the left and right edges of the rectangle that is the sculpt map are going to "stitch" to each other, and the top and bottom edges will stitch as a single point. The corresponding 3D vertices are stitched. Let's check this in the apple:
Stitching Type: Torus
When we select this one, the left and right edges of the rectangle that is the sculpt map are going to "stitch" to each other, and the top and bottom edges will also stitch to each other. As a torus would do :-)
Stitching Type: Plane
This and "none" are the same, that's why latest viewers unified this under "Plane/None". What happens with this one is that all the edges will be left un-stitched. Sculpt maps created with tools like SculptCrafter will have this stitching type, but it's also common to find it in sculpt maps for blankets, rugs, tablecloth and other sorts of "horizontal-only" objects, so to speak (not a coincidence... these 3-D shapes don't need to "close"!)
Stitching Type: Cylinder
Finally, the "cylinder" stitching type will make stitch the left and right edges of the rectangle that is the sculpt map, but as a difference with the sphere stitching type, the top and bottom edges will remain un-stitched.
If we purchase sculpt maps from other creators, usually, they indicate us which one of the four types to select. But don't worry if that is not specified anywhere: we have just four to choose among, and the one that makes the shape look right... that is the good one! :-)
This can be better understood with an example.
If you consider this sculpted shelf:

by rotating it we may adapt it to different configurations in a room:

but what if I wanted to have a SYMMETRICAL shape?
When working with regular prims, by changing the parameters of the prim (path cut, taper, etc) we can obtain the symmetrical shape of a given one... but we don't have those parameters when working with sculpted prims!
Well, that's what the "mirror" option is for :-)
It will mirror the shape by flipping the X axis of the sculpt map... like this one.

So when you have built, say, a wing, you can use this option to get the symmetrical (mirrored) one. Or shoes. Or any other application that you have in mind, and requires of a mirrored shape :-)
Note: At times, a few students asked, because they thought that by clicking the "Mirror" option, this would create another sculpt prim, mirrored... This is not what happens! Ticking this option mirrors the existent sculpt prim. If you want to have mirror and non mirrored one together, you need two prims (one for the normal sculpt, the other for the mirrored one.)
Understanding what the inside-out option is for will require of some explanations.
As you can see whenever you enter into "Wireframe" mode (CTRL SHIFT R), everything in SL is made of triangles. Triangles, in theory, have TWO faces, but SL only applies the texture to one of these faces.
Which one?
Imagine that each triangle has an arrow pointing "outside" the surface. Those arrows are called "normals." The faces that are "outside" are the ones that have the texture applied. When we tick "Inside-out", the normals get inverted. That is, the arrows point to the opposite direction. SL interprets this as the "inside" being the "outside" and thus textures those faces. The faces that were "inside".

For example, in the picture below we have the same gem to the left and to the right. The gem to the left has no changes, while the gem to the right has "Inside-Out" ticked, so the faces textured are the inner ones:

In a way, it is like flipping a sock inside-out :-)
You can find further (and more technical) references about what a sculpted prim is in the following links:
http://wiki.secondlife.com/wiki/Sculpted_Prims:_Technical_Explanation
http://wiki.secondlife.com/wiki/Sculpted_Prims_Creators_Guide
When we upload a sculpt map to SL, we have to make sure that we have ticked the box saying "Use lossless compression"! If we don't check this, our sculpt will look deformed and we'll have to upload it again.
Since sometimes a picture talks a thousand words... Let me show how dramatic it may be, to forget "Use lossless compression" checked :-)

This little check box highlighted in the picture is what we should never forget!
If I've achieved to make you all scared at how broken the poor sculpt looks... please, remember ALWAYS to have checked "Use lossless compression" when uploading sculpt maps! The only way to fix this is to UPLOAD AGAIN the map, this time, with the checkbox marked.
As a short note here, this is worth it to mention: Check it always when you upgrade your viewer. It's an option that, for some reason, might get unchecked if you change viewer. So specially if you change to another viewer, make sure it's checked... The setting could have got lost.
At least, I've convinced you all that we have to check this, right? :-)
Note: At times, students asked «Why does the "Upload using lossless" option exist, if we have to tick the box always?»
Well, not all the times! There are more small textures you may want to upload, not only sculpt maps. For example, typical particle textures will be 64x64 or 128x128 images, and in those cases, you may want to upload them compressed with loss compression, so they use less space in the server (and also need less time to be transferred.)
And here comes a very important concept.
The bounding box is the box that "wraps" the sculpted prim. When we change the size of a sculpted prim, we're changing the size of the bounding box. Let me show what I mean.
You all see this apple in front of me, and the partially transparent cube surrounding it, yes?

The apple, and the cube, have the same size.
If we rez a box, and turn it into sculpt, the visible part of the sculpt, usually, does not use all the size of the box. But for the server, the sculpt has the boundaries of the box. Although we see an apple, the server sees the box: That box is the BOUNDING BOX.
Graham Dartmouth uses a very graphical way of explaining this concept also: if you think of sculpting like beginning with an initial (rectangular) block of stone, and you begin carving (sculpting) it so you end up with a statue... The statue will be smaller, but the initial block of stone will be... the bounding box.
So a sculpt, visibly, will be, as much, as big as the bounding box, but usually smaller.
Depending of the application that we're using, we can CHANGE the size of the bounding box, and this may have important uses as we're seeing next. Also, by the end we'll talk about which applications allow us to change the size of the bounding box, as not all of them do. At times I may write just BB for Bounding Box, to type it faster.
Now we're going to see a couple of applications of understanding what the bounding box is :-)
This knowledge about what the bounding box is will show us now, quickly, the principle behind creating nano jewelry.

Ok, now let's explain what this model here means... (the one in the picture above).
Again, I have a box, and now a gem, that have the same size. But as you all can see, the visible gem is quite small compared to the box. Same size, but visible gem, quite smaller.
I'll explain next how this can be done, but before... If now I resize this set... I think... You all are going to say "oh of course! The VISIBLE gem is going to get VERY small, because the real size is bigger!", yes?
Let's prove it :-)
We know that the minimum size for prims in SL is 0.01... but... that is for the BB! Not for what's visible. If the visible is smaller... It can get REALLY tiny when we downsize the BB!

Can you see now the gem? (the tiny dot to the right of the initial gem's bounding box, kept as visual reference to compare.) And this isn't yet the minimum size possible for the BB.
Remember that when we work with such small sizes, we have to use CTRL 0 to zoom in (and then CTRL 9 to restore the camera.)
So that's the trick for nano-jewelry: the visible gem is (way) smaller than the BB. When designing the gem in the sculpt program, it was made so the bounding box was bigger around.
When you read in advertisements from sculpt creators "nano maps", they refer to this: sculpt prims that, visibly, are (way) smaller than what the BB is. The more empty space the bounding box has, the more, VISUALLY, you'll be able to reduce your sculpted prim.
So this idea, visible part smaller than the BB is clear, yes? :-)
Now, how to do this in the sculpt program?
The first that we need to know is that offworld sculpting programs will allow us to manipulate the sculpt prim in the BB (Blender, Maya, 3DS Max... even Rokuro and Tokoroten.) Not all the inworld programs will allow this, tho.
Sculpt Studio, Sculpt Crafter and Prim Generator allow this, to mention the ones I work with.
But Prim Oven does NOT allow to manipulate the bounding box. So we could not use Prim Oven to make nano jewelry, or even, to make doors pivoting around an hinge, as I'll show next.
Don't worry now about the features that each program could have: I'll talk about them to conclude the class with.
I'm going to show what I mean with "manipulating the bounding box" with Sculpt Studio.
Please keep in mind that this is not a class on Sculpt Studio, it's just a quick demonstration of the idea. Refer to the material you have about the tools for the detailed "how", as they're not the focus of this class :-)
Let me quickly rez a mat with just 8 slices:

Let's assume this is my future sculpt. Now I have to define the BB in Sculpt Studio, and this tool rezzes it.

I can tell it to auto adjust, yes, and it does it.

But now, I can make this box bigger... with the edit window, as I would resize any other box. That's how I have manipulated the BB.

Do you see that when I do this, the sculpt I'll get, will be as the gem? (that is, that the visible sculpt is going to be smaller than the BB.)
So I can manipulate the BB to create a nano-gem.
And I can even move the sculpt in the BB!
Like this...

And why would I move the BB off from its center?
We're going to see right now an example, another application of being able of manipulating the sculpt prim inside the BB.
Note: This material is developed in more detail in its own entry. It covers the concept of "door" in SL, and explains how to create doors that would rotate around the hinge, from boxes to sculpts and mesh. It also explains the foundation of "door scripts", so builders know what they're looking for exactly when it comes to give interactivity to doors.
We can't finish a class about sculpted prims without mentioning an important concept that we have to take care of, when working with sculpts: LOD.
LOD is the abbreviation of Level Of Detail, and it refers to the detail that the client (your viewer) will render for a sculpted prim. The closer we are of a sculpted prim, the more detail our viewer will render for that sculpted prim and the reverse: the further from that sculpted prim, the less detail our viewer will render.
But sometimes, when we zoom out, instead of simply losing detail (say, a circle is now seen as an octagon), the sculpted prim completely loses the shape.
Like... This shelf I've just rezzed.

This one breaks very badly as we walk away from it!

This happens when the sculpted prim is not designed taking into account what we'll call "LOD levels". Usually, "a bad LOD" means "a poorly created sculpted prim".
What happens with LOD is what we can see in the picture:

At LOD level 1, that is, when we're "close" to the sculpted prim, our viewer renders all the vertices specified in the sculpt map, and we see the shape as is.
But when we zoom out, the viewer renders only the points at LOD level 2, that is, every fourth vertex from the sculpt map. The shape loses definition, but if it's well crafted, it should not break, just be more polygonal (like, a sphere looks like an octagon - just because the viewer renders less points, but if well crafted, we still see a pot, like here, not a broken thing like the shelf.)
Things may get even worse by zooming further, since the viewer will render only the points at LOD level 3, that is, every 16th vertex from the sculpt map. The shape loses even more definition.
When working with tools like SculptCrafter, Prim Generator, Prim Oven... we have to expect this for small bounding boxes, since the miracle of packing so many prims comes precissely at the expense of losing LOD in this case.
There's a workaround that consists on changing the debug setting renderVolumeLODFactor, raising it up to 4.0, but we have to take into account that this workaround is client side: not all the residents even know where the debug settings are, so we should not put on the residents side the responsibility for our sculpted prims looking good (not skew and broken) no matter the distance.
Depending of the tool, we may work the shape so it's LOD-resistant... or we can do nothing at all to fix it, if the shape breaks.
Offworld tools will allow you to manipulate each vertex and see the LODs, so in these ones we should be able to create sculpts that don't break with the distance.
When it comes to inworld tools, it might not be possible.
In Sculpt Studio, we can also manipulate each vertex individually, so we should be able of creating sculpts that don't break with the distance.
SculptCrafter has the LOD plugin, which basically multiplies by 4 the total of vertices to make sure that we will have shapes that don't break at LOD 2 (but this could "mess" the texturing - this bit is covered in the "SculptCrafter: Plugins" class.)
Prim Generator allows this by creating a bigger BB than the required (this bit is covered in the "Prim Generator" class.)
Ok, so we know now a lot of things about sculpted prims... And *how* do we create them?
We create them by using a program that allows to export a 3-D shape in a sculpt map. There are inworld programs (that is, we work the sculpt *in* SL) and offworld programs.
Both inworld and offworld programs create *the sculpt map* that you have to later apply in a sculpted prim, so you get the actual sculpt :-)
Offworld programs like Blender, Maya, 3DS Max... allow us to create all type of sculpted objects, but these programs usually have a steep learning curve.
Some specific kind of shapes are much more easily created with other applications, and perhaps we just need to learn these for some basic uses. To help you, I've prepared a list that shows which kind of shapes we can work best with which program, features and limits.
The first to mention are the revolution and extrusion shapes like glasses, bottles, candles, pots, stars, hearts... All those shapes are (very easily) created with Rokuro and Tokoroten.
Then we have Sculpt Studio. You may create any kind of sculpted prim with it. It's an inworld tool that works in "slices". The idea is, think of your 3D object, imagine how you would slice it, and work those slices. This is very close to "real sculpting" in an offline application such as Blender.
However, there are other builds that are benefited of some specific inworld tools: builds made of blocks such as furniture, stairs and fences, to mention some.
Here it is where we have several tools to choose... I personally prefer to have as many tools as possible, since each one has a specific advantage that the others don't have... but the following information will also help you take an informed decision if your budget is limited and you have to decide one among all.
PRIM OVEN
PRIM GENERATOR
SCULPTCRAFTER
So I hope that knowing this, helps you taking an informed decision if you have to choose one.
I wish that you come away with new knowledge. Thank you all for coming.
-- Auryn Beorn
Hopefully, the content of this class will clarify many questions about them.
INTRODUCTION TO SCULPTED PRIMS
Welcome everybody. I am Auryn Beorn and I'll be your instructor for this class.
When I started teaching SculptCrafter, I began class doing always a short reminder of what a sculpted prim is, and its limits, to then focus the attention in this tool.
But after near a year teaching it, I've added so much material coming from all what students asked about because they didn't know, and it was so necessary to know... that I've realized this has to be separate, and a prerequisite for the SculptCrafter class... as well as for other classes regarding creating sculpted prims that I've started teaching, like the generics for "Prim Generator".
So...
- What is a sculpted prim?
- What can we expect from them?
- What are their limits?
- What is the bounding box?
- How the nano jewelry is created?
- And LOD? What does that mean?
- Which tools do we have to create sculpted prims and what can we expect from them?
This class will answer all those questions, essential for any builder, and will be a sure prerequisite for all my classes about tools to create sculpted prims.
Also, after the first experiences in this class, I've decided to separate the "linking phantom and non phantom prims" section in a different class. We were already running over two hours!
WHAT A SCULPTED PRIM IS AND ITS LIMITS
We have several basic building block types (box, cylinder, sphere, torus, etc.) that we may resize, rotate and "torture" a bit (by changing taper, path cut, hollow, twist...), and then we have a special building block type: Sculpted.
This one allows us to create more complex shapes than the ones we can achieve with the rest of the prims, and requires from an application to create them, so we can "import" them to SL.
Nowadays we also have mesh, but mesh could be seen as a separate object type, for we can't, for example, change the building block type of a prim from box, to mesh. That can't be done. However, from box to sculpt, we can do this.
When we choose that building block type, the "Edit" window changes, showing us the following: a "rainbow" texture and a few options below ("Mirror", "Inside-out" and the stitching mode).

This "rainbow texture" is what defines the shape of the sculpted prim, and it's called "the sculpt map". Each dot in that texture defines a point in the 3D space. The RGB components of that dot are interpreted as the coordinates of the point or "vertex", relative to the bounding box.
Up to here, I guess you were familiar with this, right? :-)
How many vertices a sculpt prim may have may depend of the configuration of the sculpt map. A valid sculpt map may have several resolutions like 32x32 or 16x64. We will stick to this basic idea: a sculpt prim may have 1024 faces, that are distributed in rows of the same length. At times, we may hear that each one of those rows is called "slice" (for example, Sculpt Studio uses this name.)
As soon as we select the "Sculpted" building block type, SL shows us an apple: that's the default sculpted prim. To change it, we have to click the "rainbow texture" and select a sculpt map from our inventory, or we can drag and drop a full perms (or a copy/no modify/transfer) map on to the rainbow texture box.
How do we obtain sculpt maps? We may for example, buy them from other creators. And we also may create sculpt maps, with specific tools. We'll talk later about which tools we may use to create sculpt prims.
Apart from this "rainbow texture" (sculpt map), which defines the shape of the sculpted prim, we need also to apply a texture for the sculpted prim. This, as usual, is found under the "Texture" tab in the "Edit" window.

So, yes, to create a sculpted prim, we need TWO textures: one it's the sculpt map itself, then, the texture to texture this sculpt prim.
Note: At times, students asked the following: "Are sculpted prims more laggy than regular ones, for they need two textures?"
The answer is, sculpt prims are more laggy than regular ones, but not because they need two textures. The sculpt map is a very tiny file that is transferred quickly to your computer, almost instantly (however, I've seen sculpt maps as crazy as 1024x1024... when 32x32 or 64x64 top would have been enough). What may cause client side lag is the rendering of the sculpts, because your computer is going to be busy decoding the map to represent the corresponding 3D shape.
STITCHING TYPE
And what does the "stitching type" means? This refers to the way that the dots in the edges of the sculpt map connect in the 3D shape... or don't connect at all!
Remember that a sculpt map, as we've seen is a texture: we're talking about a 2-Dimensional entity: the rectangle that the texture is, and rectangles... have edges.
Four edges: top-left-bottom-right.
But now, this rectangle is mapped into a 3-D shape... so if we want to "close" the shape, we may have to "stitch" the edges of the rectangle, when they are applied to the 3D shape.
Where do we set the stitching type, to begin with? We set it under "Stitching type":

And how does this stitching behave? This is better understood by showing how the four different stitching types are applied, which we're going to see now. Some types are not completely obvious, so also a representation in wireframe mode (CTRL SHIFT R) will be shown.
Note: The keys that bring wireframe mode up behave as a toggle. CTRL SHIFT R turns wireframe mode on, CTRL SHIFT R again turn wireframe mode off, so we're back to our normal SL.
Stitching Type: Sphere
When we select this one, the left and right edges of the rectangle that is the sculpt map are going to "stitch" to each other, and the top and bottom edges will stitch as a single point. The corresponding 3D vertices are stitched. Let's check this in the apple:
 |  |
Stitching Type: Torus
When we select this one, the left and right edges of the rectangle that is the sculpt map are going to "stitch" to each other, and the top and bottom edges will also stitch to each other. As a torus would do :-)
 |  |
Stitching Type: Plane
This and "none" are the same, that's why latest viewers unified this under "Plane/None". What happens with this one is that all the edges will be left un-stitched. Sculpt maps created with tools like SculptCrafter will have this stitching type, but it's also common to find it in sculpt maps for blankets, rugs, tablecloth and other sorts of "horizontal-only" objects, so to speak (not a coincidence... these 3-D shapes don't need to "close"!)
 |  |
Stitching Type: Cylinder
Finally, the "cylinder" stitching type will make stitch the left and right edges of the rectangle that is the sculpt map, but as a difference with the sphere stitching type, the top and bottom edges will remain un-stitched.
 |  |
If we purchase sculpt maps from other creators, usually, they indicate us which one of the four types to select. But don't worry if that is not specified anywhere: we have just four to choose among, and the one that makes the shape look right... that is the good one! :-)
The MIRROR option
This can be better understood with an example.
If you consider this sculpted shelf:

by rotating it we may adapt it to different configurations in a room:

but what if I wanted to have a SYMMETRICAL shape?
When working with regular prims, by changing the parameters of the prim (path cut, taper, etc) we can obtain the symmetrical shape of a given one... but we don't have those parameters when working with sculpted prims!
Well, that's what the "mirror" option is for :-)
It will mirror the shape by flipping the X axis of the sculpt map... like this one.

So when you have built, say, a wing, you can use this option to get the symmetrical (mirrored) one. Or shoes. Or any other application that you have in mind, and requires of a mirrored shape :-)
Note: At times, a few students asked, because they thought that by clicking the "Mirror" option, this would create another sculpt prim, mirrored... This is not what happens! Ticking this option mirrors the existent sculpt prim. If you want to have mirror and non mirrored one together, you need two prims (one for the normal sculpt, the other for the mirrored one.)
The INSIDE-OUT option
Understanding what the inside-out option is for will require of some explanations.
As you can see whenever you enter into "Wireframe" mode (CTRL SHIFT R), everything in SL is made of triangles. Triangles, in theory, have TWO faces, but SL only applies the texture to one of these faces.
Which one?
Imagine that each triangle has an arrow pointing "outside" the surface. Those arrows are called "normals." The faces that are "outside" are the ones that have the texture applied. When we tick "Inside-out", the normals get inverted. That is, the arrows point to the opposite direction. SL interprets this as the "inside" being the "outside" and thus textures those faces. The faces that were "inside".

For example, in the picture below we have the same gem to the left and to the right. The gem to the left has no changes, while the gem to the right has "Inside-Out" ticked, so the faces textured are the inner ones:

In a way, it is like flipping a sock inside-out :-)
You can find further (and more technical) references about what a sculpted prim is in the following links:
http://wiki.secondlife.com/wiki/Sculpted_Prims:_Technical_Explanation
http://wiki.secondlife.com/wiki/Sculpted_Prims_Creators_Guide
IMPORTANT! CHECK THAT YOU UPLOAD USING LOSSLESS COMPRESSION!
When we upload a sculpt map to SL, we have to make sure that we have ticked the box saying "Use lossless compression"! If we don't check this, our sculpt will look deformed and we'll have to upload it again.
Since sometimes a picture talks a thousand words... Let me show how dramatic it may be, to forget "Use lossless compression" checked :-)

This little check box highlighted in the picture is what we should never forget!
If I've achieved to make you all scared at how broken the poor sculpt looks... please, remember ALWAYS to have checked "Use lossless compression" when uploading sculpt maps! The only way to fix this is to UPLOAD AGAIN the map, this time, with the checkbox marked.
As a short note here, this is worth it to mention: Check it always when you upgrade your viewer. It's an option that, for some reason, might get unchecked if you change viewer. So specially if you change to another viewer, make sure it's checked... The setting could have got lost.
At least, I've convinced you all that we have to check this, right? :-)
Note: At times, students asked «Why does the "Upload using lossless" option exist, if we have to tick the box always?»
Well, not all the times! There are more small textures you may want to upload, not only sculpt maps. For example, typical particle textures will be 64x64 or 128x128 images, and in those cases, you may want to upload them compressed with loss compression, so they use less space in the server (and also need less time to be transferred.)
And here comes a very important concept.
THE BOUNDING BOX
The bounding box is the box that "wraps" the sculpted prim. When we change the size of a sculpted prim, we're changing the size of the bounding box. Let me show what I mean.
You all see this apple in front of me, and the partially transparent cube surrounding it, yes?

The apple, and the cube, have the same size.
If we rez a box, and turn it into sculpt, the visible part of the sculpt, usually, does not use all the size of the box. But for the server, the sculpt has the boundaries of the box. Although we see an apple, the server sees the box: That box is the BOUNDING BOX.
Graham Dartmouth uses a very graphical way of explaining this concept also: if you think of sculpting like beginning with an initial (rectangular) block of stone, and you begin carving (sculpting) it so you end up with a statue... The statue will be smaller, but the initial block of stone will be... the bounding box.
So a sculpt, visibly, will be, as much, as big as the bounding box, but usually smaller.
Depending of the application that we're using, we can CHANGE the size of the bounding box, and this may have important uses as we're seeing next. Also, by the end we'll talk about which applications allow us to change the size of the bounding box, as not all of them do. At times I may write just BB for Bounding Box, to type it faster.
Now we're going to see a couple of applications of understanding what the bounding box is :-)
CREATING NANO JEWELRY
This knowledge about what the bounding box is will show us now, quickly, the principle behind creating nano jewelry.

Ok, now let's explain what this model here means... (the one in the picture above).
Again, I have a box, and now a gem, that have the same size. But as you all can see, the visible gem is quite small compared to the box. Same size, but visible gem, quite smaller.
I'll explain next how this can be done, but before... If now I resize this set... I think... You all are going to say "oh of course! The VISIBLE gem is going to get VERY small, because the real size is bigger!", yes?
Let's prove it :-)
We know that the minimum size for prims in SL is 0.01... but... that is for the BB! Not for what's visible. If the visible is smaller... It can get REALLY tiny when we downsize the BB!

Can you see now the gem? (the tiny dot to the right of the initial gem's bounding box, kept as visual reference to compare.) And this isn't yet the minimum size possible for the BB.
Remember that when we work with such small sizes, we have to use CTRL 0 to zoom in (and then CTRL 9 to restore the camera.)
So that's the trick for nano-jewelry: the visible gem is (way) smaller than the BB. When designing the gem in the sculpt program, it was made so the bounding box was bigger around.
When you read in advertisements from sculpt creators "nano maps", they refer to this: sculpt prims that, visibly, are (way) smaller than what the BB is. The more empty space the bounding box has, the more, VISUALLY, you'll be able to reduce your sculpted prim.
So this idea, visible part smaller than the BB is clear, yes? :-)
Now, how to do this in the sculpt program?
The first that we need to know is that offworld sculpting programs will allow us to manipulate the sculpt prim in the BB (Blender, Maya, 3DS Max... even Rokuro and Tokoroten.) Not all the inworld programs will allow this, tho.
Sculpt Studio, Sculpt Crafter and Prim Generator allow this, to mention the ones I work with.
But Prim Oven does NOT allow to manipulate the bounding box. So we could not use Prim Oven to make nano jewelry, or even, to make doors pivoting around an hinge, as I'll show next.
Don't worry now about the features that each program could have: I'll talk about them to conclude the class with.
I'm going to show what I mean with "manipulating the bounding box" with Sculpt Studio.
Please keep in mind that this is not a class on Sculpt Studio, it's just a quick demonstration of the idea. Refer to the material you have about the tools for the detailed "how", as they're not the focus of this class :-)
Let me quickly rez a mat with just 8 slices:

Let's assume this is my future sculpt. Now I have to define the BB in Sculpt Studio, and this tool rezzes it.

I can tell it to auto adjust, yes, and it does it.

But now, I can make this box bigger... with the edit window, as I would resize any other box. That's how I have manipulated the BB.

Do you see that when I do this, the sculpt I'll get, will be as the gem? (that is, that the visible sculpt is going to be smaller than the BB.)
So I can manipulate the BB to create a nano-gem.
And I can even move the sculpt in the BB!
Like this...

And why would I move the BB off from its center?
We're going to see right now an example, another application of being able of manipulating the sculpt prim inside the BB.
CREATING DOORS THAT PIVOT AROUND AN HINGE
Note: This material is developed in more detail in its own entry. It covers the concept of "door" in SL, and explains how to create doors that would rotate around the hinge, from boxes to sculpts and mesh. It also explains the foundation of "door scripts", so builders know what they're looking for exactly when it comes to give interactivity to doors.
We can't finish a class about sculpted prims without mentioning an important concept that we have to take care of, when working with sculpts: LOD.
BUT... WHAT DOES LOD MEAN?
LOD is the abbreviation of Level Of Detail, and it refers to the detail that the client (your viewer) will render for a sculpted prim. The closer we are of a sculpted prim, the more detail our viewer will render for that sculpted prim and the reverse: the further from that sculpted prim, the less detail our viewer will render.
But sometimes, when we zoom out, instead of simply losing detail (say, a circle is now seen as an octagon), the sculpted prim completely loses the shape.
Like... This shelf I've just rezzed.

This one breaks very badly as we walk away from it!

This happens when the sculpted prim is not designed taking into account what we'll call "LOD levels". Usually, "a bad LOD" means "a poorly created sculpted prim".
What happens with LOD is what we can see in the picture:

At LOD level 1, that is, when we're "close" to the sculpted prim, our viewer renders all the vertices specified in the sculpt map, and we see the shape as is.
But when we zoom out, the viewer renders only the points at LOD level 2, that is, every fourth vertex from the sculpt map. The shape loses definition, but if it's well crafted, it should not break, just be more polygonal (like, a sphere looks like an octagon - just because the viewer renders less points, but if well crafted, we still see a pot, like here, not a broken thing like the shelf.)
Things may get even worse by zooming further, since the viewer will render only the points at LOD level 3, that is, every 16th vertex from the sculpt map. The shape loses even more definition.
When working with tools like SculptCrafter, Prim Generator, Prim Oven... we have to expect this for small bounding boxes, since the miracle of packing so many prims comes precissely at the expense of losing LOD in this case.
There's a workaround that consists on changing the debug setting renderVolumeLODFactor, raising it up to 4.0, but we have to take into account that this workaround is client side: not all the residents even know where the debug settings are, so we should not put on the residents side the responsibility for our sculpted prims looking good (not skew and broken) no matter the distance.
Depending of the tool, we may work the shape so it's LOD-resistant... or we can do nothing at all to fix it, if the shape breaks.
Offworld tools will allow you to manipulate each vertex and see the LODs, so in these ones we should be able to create sculpts that don't break with the distance.
When it comes to inworld tools, it might not be possible.
In Sculpt Studio, we can also manipulate each vertex individually, so we should be able of creating sculpts that don't break with the distance.
SculptCrafter has the LOD plugin, which basically multiplies by 4 the total of vertices to make sure that we will have shapes that don't break at LOD 2 (but this could "mess" the texturing - this bit is covered in the "SculptCrafter: Plugins" class.)
Prim Generator allows this by creating a bigger BB than the required (this bit is covered in the "Prim Generator" class.)
TOOLS TO CREATE SCULPTED PRIMS
Ok, so we know now a lot of things about sculpted prims... And *how* do we create them?
We create them by using a program that allows to export a 3-D shape in a sculpt map. There are inworld programs (that is, we work the sculpt *in* SL) and offworld programs.
Both inworld and offworld programs create *the sculpt map* that you have to later apply in a sculpted prim, so you get the actual sculpt :-)
Offworld programs like Blender, Maya, 3DS Max... allow us to create all type of sculpted objects, but these programs usually have a steep learning curve.
Some specific kind of shapes are much more easily created with other applications, and perhaps we just need to learn these for some basic uses. To help you, I've prepared a list that shows which kind of shapes we can work best with which program, features and limits.
The first to mention are the revolution and extrusion shapes like glasses, bottles, candles, pots, stars, hearts... All those shapes are (very easily) created with Rokuro and Tokoroten.
Then we have Sculpt Studio. You may create any kind of sculpted prim with it. It's an inworld tool that works in "slices". The idea is, think of your 3D object, imagine how you would slice it, and work those slices. This is very close to "real sculpting" in an offline application such as Blender.
However, there are other builds that are benefited of some specific inworld tools: builds made of blocks such as furniture, stairs and fences, to mention some.
Here it is where we have several tools to choose... I personally prefer to have as many tools as possible, since each one has a specific advantage that the others don't have... but the following information will also help you take an informed decision if your budget is limited and you have to decide one among all.
PRIM OVEN
- We can work only with boxes and cylinders (which allow only path cut, taper and top shear - we can't use the rest: hollow, twist, slice.)
- It "packs" up to 16 prims in one sculpt prim.
- The bounding box fits the size of the build, but we can't make it have a custom size - to make pivot doors, etc, we have to import the map in Blender and manipulate it there.
- Also, the data is output to chat: we have to save this in an external text editor and then open it with our browser.
PRIM GENERATOR
- It allows boxes, cylinders, spheres, torus and tubes as shapes, and many transformations for them.
- We can "pack", per sculpt, up to 32 prims.
- Also, we CAN manipulate the BB and we can move the build within the BB.
- The sculpt map is a PNG file that we have to download from the creator's website.
SCULPTCRAFTER
- It allows boxes, cylinders and spheres.
- In this one we can "pack", per sculpt, up to 42 normal boxes, 64 if planks (texture "broken" in two sides) or 85 if spikes (full tapered boxes.)
- Also, we may move the build inside the BB.
- But for a custom BB size, we need a plugin apart.
- The sculpt map is a BMP file that we have to download from their website.
So I hope that knowing this, helps you taking an informed decision if you have to choose one.
I wish that you come away with new knowledge. Thank you all for coming.
-- Auryn Beorn
reincarnation gone horribly wrong MJ Rose
MJ Rose's photo pic
DIY High Heel Cupcakes
http://www.ancient-origins.net/news-general/top-ten-ancient-egyptian-discoveries-2014-002503

村上春樹 《沒有女人的男人們》
村上春樹新作《沒有女人的男人們》中文版

村上春樹于2014年4月在日本出版了他的最新短篇小說集《沒有女人的男人們》,這是他繼《東京奇譚集》之後,時隔九年再次回歸短篇小說創作,該作品在日本銷售已經突破50萬冊。據上海譯文出版社消息,《沒有女人的男人們》簡體中文版將於2015年的3月面市。
《沒有女人的男人們》共收錄7篇小說,均圍繞著同一主題:各種因女人離去、或即將離去的男人處境,這與村上春樹早期短篇中著重表現年輕人的喪失
感和焦躁感有所不同。村上春樹則稱之為“概念式”的短篇小說集:“之於我最大的快慰——集中寫短篇小說時每每如此——莫過於可以在短時間裏將各種手法、各
種文體、各種語境一個接一個嘗試下去。可以從種種樣樣的角度對同一主題進行立體式審視、追索、驗證,可以用種種人稱寫種種人物。在這個意義上,以音樂說
來,這本書或許可以成為對應于‘概唸唱片集’的東西。實際上寫這些作品的時間裏,我也把‘甲殼蟲’和‘沙灘男孩’輕輕放在腦海裏。”
為何會圍繞這個主題創作?村上春樹稱,雖然那種具體的事件近來並未實際發生在自己身上,也沒有見過那樣的實例,但他想把那類男人們的形象和心境 急不可耐地加工敷衍成幾個各不相同的故事,“說不定那是我這個人的‘現在’的一個隱喻,也可能是一種委婉的預言,抑或我個人需要那樣的‘驅魔儀式’亦未可 知。”
其實村上春樹並不是第一個對“沒有女人的男人們”這個主題產生強烈興趣的作者。早前海明威曾有本同名短篇小說集,村上春樹也承認自己在寫作的時 候也想起海明威的這本書。但是他認為,“海明威短篇集《Men Without Women》這個書名,較之《沒有女人的男人們》,還是譯為《不要女人的男人們》更接近原來書名的感覺。相比之下,我這本書更為直截了當,完完全全是‘沒 有女人的男人們’——由於各種各樣的原因被女性拋棄的男人們或即將被女性拋棄的男人們。”
為保證譯文準確流暢,上海譯文出版社除翻譯家林少華外,還邀請了竺家榮、毛丹青、姜建強、岳遠坤、陸求實這五位譯者,並根據這六位譯者的譯筆特色分別安排了不同的篇目,期待呈現給讀者一個多面性的村上春樹。
為何會圍繞這個主題創作?村上春樹稱,雖然那種具體的事件近來並未實際發生在自己身上,也沒有見過那樣的實例,但他想把那類男人們的形象和心境 急不可耐地加工敷衍成幾個各不相同的故事,“說不定那是我這個人的‘現在’的一個隱喻,也可能是一種委婉的預言,抑或我個人需要那樣的‘驅魔儀式’亦未可 知。”
其實村上春樹並不是第一個對“沒有女人的男人們”這個主題產生強烈興趣的作者。早前海明威曾有本同名短篇小說集,村上春樹也承認自己在寫作的時 候也想起海明威的這本書。但是他認為,“海明威短篇集《Men Without Women》這個書名,較之《沒有女人的男人們》,還是譯為《不要女人的男人們》更接近原來書名的感覺。相比之下,我這本書更為直截了當,完完全全是‘沒 有女人的男人們’——由於各種各樣的原因被女性拋棄的男人們或即將被女性拋棄的男人們。”
為保證譯文準確流暢,上海譯文出版社除翻譯家林少華外,還邀請了竺家榮、毛丹青、姜建強、岳遠坤、陸求實這五位譯者,並根據這六位譯者的譯筆特色分別安排了不同的篇目,期待呈現給讀者一個多面性的村上春樹。
【編輯:李明陽】
Subscribe to:
Posts (Atom)